Rock The World of Your Little Climbers: DIY Tips for Crafting a Kid-Friendly Climbing Wall!
Hey there, adventurers! Calling all tiny thrill-seekers looking for a new challenge that requires both coordination and strength - we’ve got an adrenaline-pumping DIY for you! Are your little ones bored with the same old playgrounds and jungle gyms? We’ve got just the thing to liven up their playtime and get those gross motor skills moving.
Get ready to climb to new heights with our beginner-friendly guide on how to make a rock climbing wall for kids. This fun and functional project will give you and your children a sense of accomplishment, along with providing hours of entertainment. So grab your hard hats, and let’s get to work!
1. Gather Materials
Before you begin, you'll need to gather some materials. You'll need wood (for the frame and holds), screws, drill bits, sandpaper, wood glue, paint or stain (for finishing touches). Make sure you have enough wood pieces cut and ready before beginning construction.
If possible, it's best to use pre-cut lumber as it will be less expensive and easier to work with than buying individual boards and cutting them yourself.
2. Construct the Frame
Once you have all your materials gathered, start by constructing the frame of the wall. Measure out the size you want it to be, and then cut pieces of wood accordingly. It's important that each piece fits together snugly so there are no gaps where kids could get their fingers stuck. Secure each piece with screws or nails as necessary.
3. Add Holds
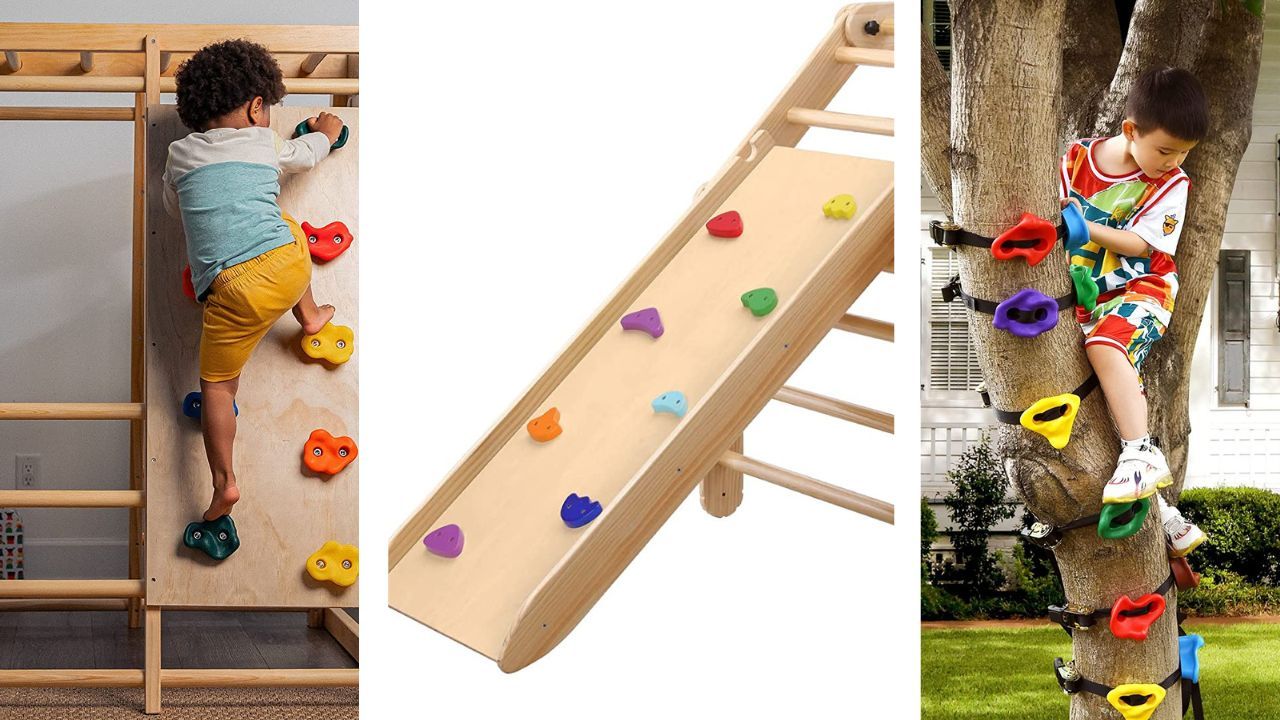
Next, add holds onto the frame of your rock climbing wall. You can buy plastic holds at any outdoor store or online for relatively cheap prices; alternatively, you can make your own by using old pieces of wood or other objects like rocks or even PVC pipes if they fit securely on the frame without slipping off easily when in use. Take care when attaching holds. Make sure they are firmly secured in place so they don't come off during use!
4. Sand & Finish
Finally, sand down any rough edges on your newly constructed rock wall before adding any finish like paint or stain (optional). This will make sure that there are no sharp edges which could cause injury while kids are playing on it! Once everything is complete and dry, your rock climbing wall is ready for use!
Additional Method To Make A Climbing Wall:
Here's what you'll need:
- 6 sturdy wooden boards
- (24) 3-inch wood screws
- 48 T-nuts
- 48 bolts
- 48 washers
- 8-16 rock climbing holds
- Drill
- Allen wrench
- Safety goggles
- Paint brush (if you want to customize your climbing wall)
Step 1: Purchase Your Supplies and Safety Gear
Head on over to your local hardware store or order online to get these materials. Make sure to grab some safety goggles to protect your eyes as you work on this project.
Step 2: Determine the Size and Location
Decide how big you want your rock climbing wall to be and where it will be located. Measure the space you have and sketch out a plan. Consider the height that your wall will be, as it affects the difficulty level. A standard height is around 6-8 feet.
Step 3: Cut and Drill the Boards
Using a saw, cut the wooden boards to the desired length. Once you’ve got them cut, drill holes at each corner of each board that are large enough to fit the bolts.
Step 4: Attach the T-nuts
On the backside of your wooden boards, attach the T-nuts to each hole that you just drilled. These will be where the bolts go in.
Step 5: Assemble the Boards
Assemble the boards together using the bolts, screws and washers. Be sure to securely screw the board into the surface the wall will be on.
Step 6: Install the Climbing Holds
Use the Allen wrench to secure rock climbing holds to the wall. Make sure they’re spaced out accordingly and vary in difficulty level. You can get creative with the designs of the holds to add a personal touch.
Step 7: Customize Your Wall
At this point, your wall is ready to go. But if you want to give it some personality, go ahead and let your artistic side shine by painting and adding some graphics or custom-made designs on your wall.
Now that your rock climbing wall is ready, let your little ones go wild and climb to new heights. Be sure to also emphasize safety measures with helmets and safety pads. With this fun and functional entertainment, you'll give your kids a unique approach to physical exercise that will foster skill and cognitive development – a winning combo!
In conclusion, creating a rock climbing wall for your little ones can be a thrilling and rewarding project. With a little creativity, a few basic tools, and some rock-solid determination, you and your kids can achieve new heights of fun and achievement together. Remember to prioritize safety, encourage teamwork, and most importantly, have a blast!
However, if you do not have time to make a climbing wall- we got you! Click the button below to see what we have reviewed and chosen so that you can purchase an item that contains a climbing wall that is made already!